Digital Board Replacement
TANK PRESSURE INDICATOR KIT
165-0267 - Manual regulator control
CAUTION: To prevent damage to the programmed control board, static grounding must be worn during handling and assembly.
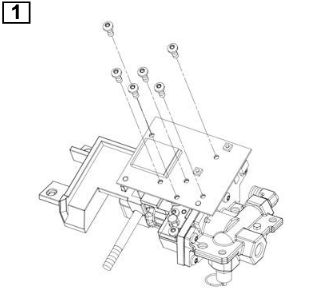
Remove 6 control board screws.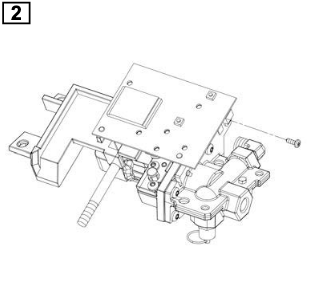
Remove triac screw.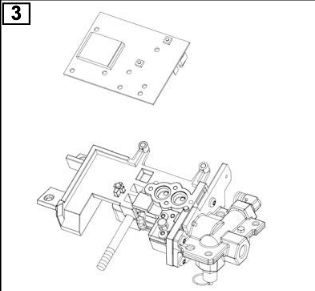
Lift the control board from the manifold.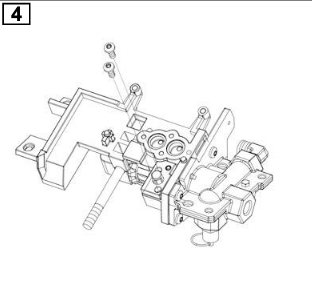
Remove the 2 screws from the tank indicator cap.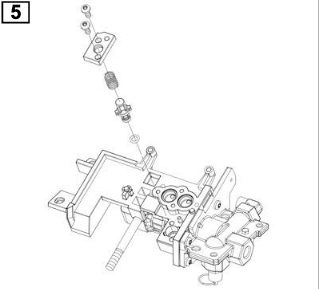
Replace the tank indicator parts with the new parts and re-install the screws. Torque to 8-10 LB-IN.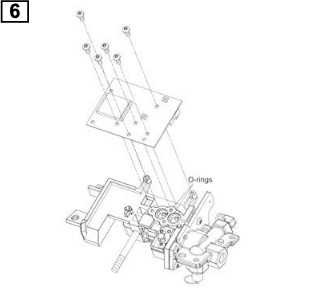
Install the control board and torque the 6 screws to 8-10 LB-IN. NOTE: Make sure the (2) o-rings are in position.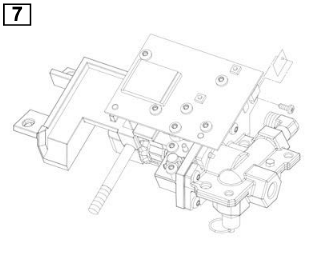
Position the sill pad between the triac on the control board and the manifold. Torque the traic screw to 8-10 LB-IN.
TANK PRESSURE INDICATOR KIT
165-0267 - Electronic regulator control
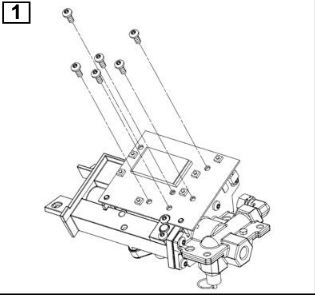
Remove 6 control board screws.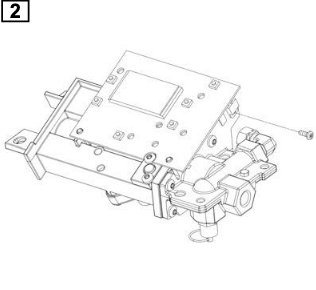
Remove triac screw.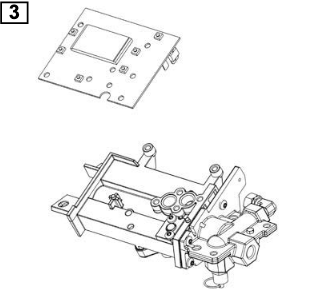
Lift the control board from the manifold.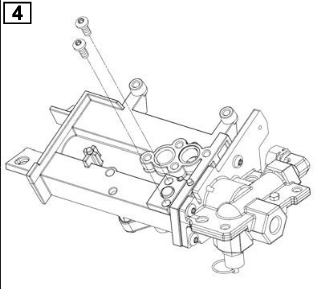
Remove the 2 screws from the tank indicator cap.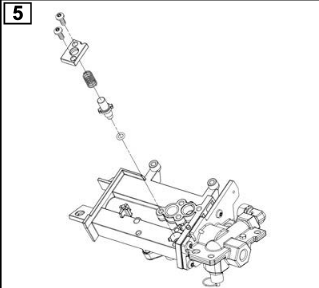
Replace the tank indicator parts with the new parts and re-install the screws. Torque to 8-10 LB-IN.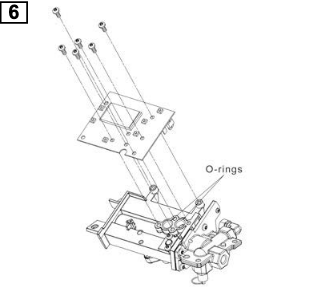
Install the control board and torque the 6 screws to 8-10 LB-IN. NOTE: Make sure the (2) o-rings are in position.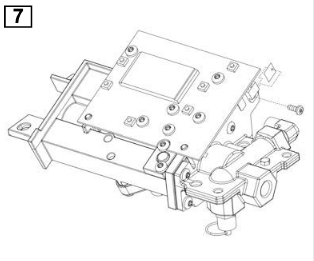
Position the sill pad between the triac on the control board and the manifold. Torque the traic screw to 8-10 LB-IN
